
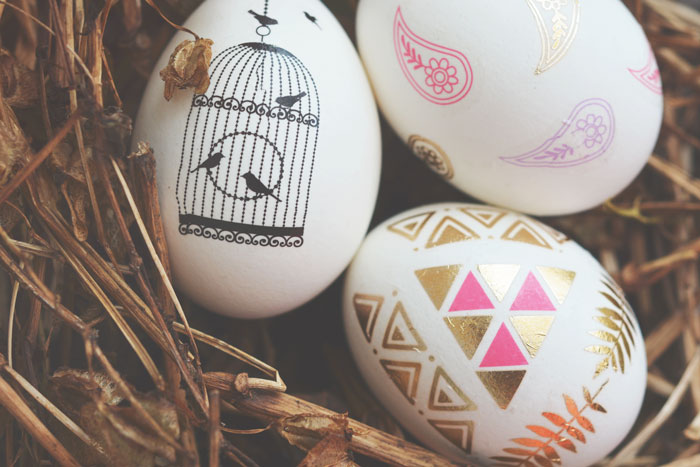
It’s not that far away until Easter and every year with Easter I have the idea to paint eggs or just make them beautiful. I saw you can use calligraphy on eggs, so that’s how I came up with the idea to not use texts but images on eggs and so I found out the: Easter Tattoo Eggs!
Material:
△ White Eggs▲ Cif (or another abrasive cleaner)
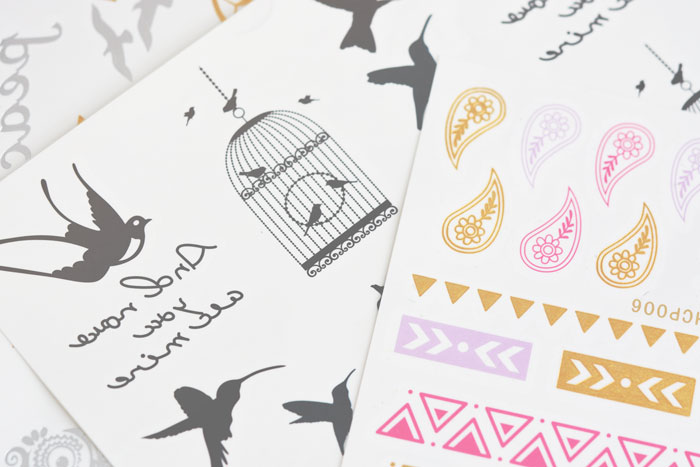
△ Fake / Temporary Tattoos
▲ Paper Towel
△ Cleaning Cloth
▲ Water

Step 1
You start of course with cooking the eggs. I chose white eggs, because I think it looks more beautiful than brown eggs, but you can choose the color you like. I had the problem that the white eggs had pink letters and because of the cooking it slowly faded away a little bit, but not enough. So I decided to use some paper towel and cif to clean the eggs to get rid of the pink letters and it worked!
Step 2
If the eggs are cooked and you cleaned the eggs if you have pink letters on your eggs then we can start with the fun part: the tattoos! I saw by the Calligraphed Eggs DIY that she used temporary tattoos, but if it works with calligraphy than it also can work with other tattoos, right?! So that was the beginning of my idea to buy some termporary tattoos and tattoo stickers on eBay, it’s really cheap there and it didn’t take that long till I received it! It’s actually step 1 to order some nice tattoos, but you just have to make sure before you start with this DIY that you have some tattoo sheets at home! Step 2 is to choose which pictures/calligraphy you want on your eggs and to cut them out.
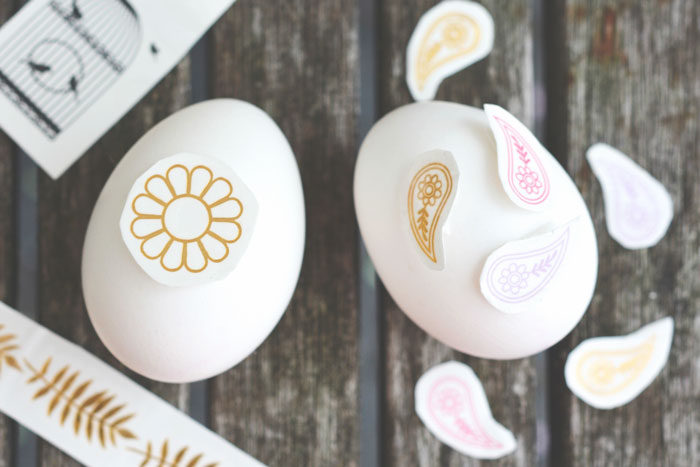
Step 3
The last step is the hardest one and you need a lot of patience for it: to stick the tattoos on your eggs. Remove the clear plastic layer and first try the tattoo on your egg, exact like how you want it. If you know the way you like it you take a very wet cleaning cloth (you use a lot of water, but not that much that you can see water drops) and slowly and carefully you make the tattoo wet. For the real perfectionists like me: you can’t make it perfect, so let it go!
Some tattoos are ready in a sec, but some tattoos takes a while. The black one was ready in a sec, but the color and gold ones took a while, so keep that in mind!
Don’t worry, cif does wonders! You need to scour a lot, but it’s a way the tattoos let go from the egg and if you clean the egg you can just add a new tattoo on it.

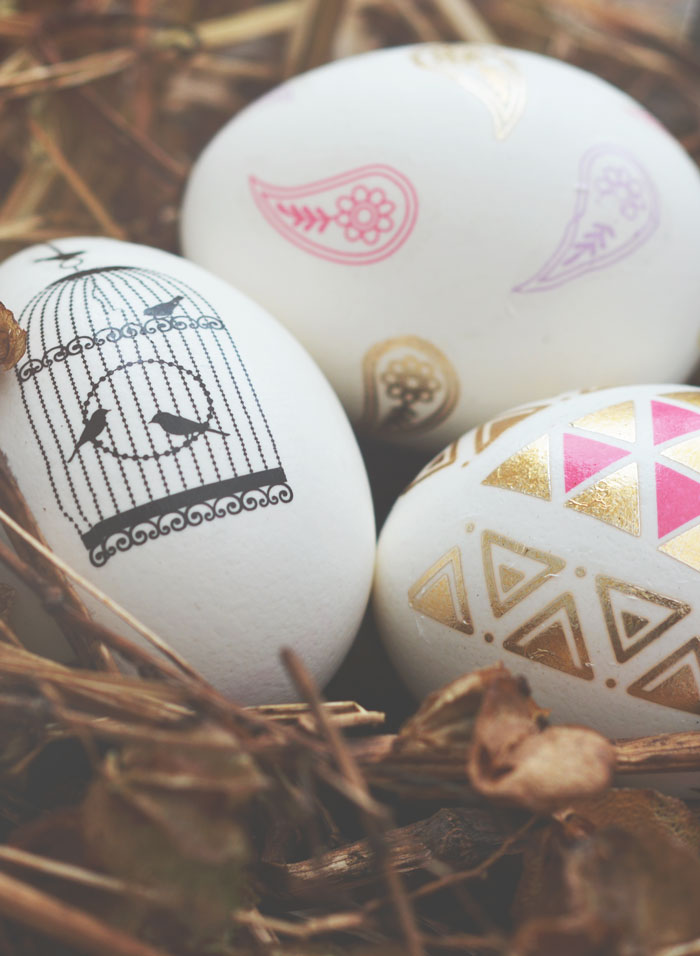

In just 3 steps you have a tattoo egg and it’s really simple, but you need to pratice a little. I needed to scour one egg with cif and I broke one egg. I also tried to find some tattoos that fits with easter, but unfortunality I didn’t found one and calligraphy is a disaster, especially those tiny little calligraphy that you need to put them word for word on your egg, so keep that in mind! Anyways I really liked to make the tattoo egg and I think it looks really beautiful!